Saturday, March 27, 2010

Stencils Idea 7 with stitching and fabric


Well, Kids, I saved the easiest one for last. All I did was take a Zoe stencil, go around the edges with a Sharpie water-based paint pen, drew a heart on it and colored it in with the same pen. When it was totally dry, I scratched off some of the paint pen by running my fingernail right to left and then top to bottom. Afterward, I wrote, on top of the scratched out paint with another color and sewed that little baby down by zigzagging it down, going around the shape of the heart only, on top of my page which I had previously embellished with fabric scraps, lace and a photo. The words may be a little hard to read at the angle the photo was shot, but they are: P.S. I love you!
If you would like to purchase any of these stencils, you can find them in my daughter Jeane's etsy store by clicking here.
I had a lot of fun playing with our stencils all week and sending out posts. I hope you will have fun playing with our stencils, too.

Friday, March 26, 2010

Stencils Idea 6 with stitching and fabric


This is the inside of the front cover of the journal I have been writing about all week. The bright pink and green are like the lining fabric for the inside of the front cover. Since every good journal needs some great pens, of course a pen pocket comes in real handy. Pen pocket. Pens in journal. Good to go, right? Certainly you could use your stencil pocket for something else, too: images, tape runner, stickers, heart's desire. I think you see where we're headed. : ) Anyway, before I get entirely carried away, after picking out an Abigail stencil in just the size I needed, all I had to do was stamp letters on it with permanent ink and sew it down around the bottom and sides. Done. I only used one row of stitching, but more like I used in other stencil projects earlier this week would be fab, too. And, if you feel like sewing a little ribbon across the top, sticking down some decorative tape, what have you, that's all good.
If you would like to buy any of these stencils, you can get them in my daughter Jeane's etsy shop.

Thursday, March 25, 2010

A Girl's Gotta Do What a Girl's Gotta Do, Right?


Apologies for interrupting my seven days of what to do with Jeane's and my stencils, but a girl's gotta do wha... oh, we covered that in the title. There will still be seven days in a row, so no worries, yes, including today, Friends. Go one article below.
Ok, so I tottered over to my mailbox just a short time ago in the late of night, and tucked neatly inside was the newest edition of Haute Handbags. My article and tote, It's Hip to be Square is on p. 132. There is no doubt in my mind that this is the best edition ever published for this magazine. Really, really mean it. And I am so pleased to be a part of it. It is scheduled for newsstands April 1.
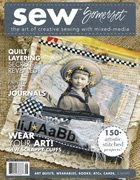
I have been unable to find the correct cover picture to include on my sidebar, but when I do, I'm gonna be all over it. For now, this photo I took of it will have to suffice. If you look carefully, you will see some of the journals I have been working on to sell when I teach at Art Unraveled this year sitting under the magazine. Fun, fun times ahead!

Stencils Idea 5 with stitching and fabric


I know I have been blogging about the fabric journal my previous posts are in. Today you get to see the cover. Attached to the edge of the cover is a little tab made from a Grace stencil. All I did was outline it in Sharpie water-based paint pen, stamp it with a polka dot stamp and permanent lime green ink, cut it in half and sew it down. Using different sizes of stencils will create very different tabs. I think I want to try using a stencil the same length as my page and have it run down the entire length of the book. These little tabs could be kept clear, spritzed with spray ink, doodled on, whatever makes your heart happy, and used on as many pages as you would like. What fun! If you would like to buy any of these stencils, you can get them in my daughter Jeane's etsy shop.

Wednesday, March 24, 2010

Stencils Idea 4 with stitching and fabric


This is probably my favorite of all. I started with a Luca stencil and put little dash lines around the edges with a permanent marker. Then I laid the stencil on my fabric page. The fabric page had already been spritzed with liquid watercolor and heat dried, so it was ready to go. After placing the stencil on the fabric, I simply stitched straight lines across it, leaving the loose ends dangling. The lines are now ready to be written on. I didn't do that before the photo because I wanted you to be able to see the detail. The cool part about the lines is that they show through on the other side where they can be written on again. I simply stamped around them with permanent ink, and the page looks very different. My last step was rubbing on some leftover rubons for a little extra embellishment. Although I used a very large stencil, the same effect, of course could be achieved with any size in any place you want a little writing. If you would like to buy any of these stencils, you can get them in my daughter Jeane's etsy shop.

Tuesday, March 23, 2010

Stencils Idea 3 with stitching and fabric


In case you have never heard of a tip in, it is a page that is tipped in or added after a book is already made, thereby adding one more page to a book. That is pretty much what I did today. If you choose to try this, you can do it before hand to look like it was tipped in later, or you can actually do it as described first. Anyway, first I outlined an Olivia stencil with a permanent marker, then I wrote a message, also using a permanent marker. The paper in the first photo doesn't really belong in the book, but I put it there to make reading it easier. The second photo shows a more accurate representation. Last, I drew on a little heart using a Sharpie water-based paint pen and sewed the stencil page down to an existing fabric page that I had embellished with other stitching, ribbon, a photo, a fabric scrap, and some wide lace which extends beyond the edge of the fabric page as an added decoration when the book is closed. If you are interested in getting any of these stencils, visit my daughter Jeane's etsy shop by clicking here.

Monday, March 22, 2010

Stencils Idea 2 with stitching and fabric


Today you get to see what I did with the Olivia stencil I saved from yesterday without washing it off. After smearing it while still wet, and allowing it to dry, I turned the stencil upside down (inky side down on fabric and clean side up) on one of my book pages and sewed it down with intentionally uneven stitches. First, I sewed with lime green and then I sewed with black. Afterward, I just placed another scrap from the book cover on top of the stencil, cut out a heart from another scrap I had in my scrap stash, and zigzagged around it. If you would like to buy any of these stencils, you can get them in my daughter Jeane's etsy shop.